


You’ve made a thoughtful decision to protect your family, community, or employees by purchasing an Automated External Defibrillator. The box has arrived, and inside is a device that can save a life. It's normal to feel a mix of readiness and a little bit of anxiety right now. You might be wondering, "Did I get everything I need? Am I setting this up correctly?"
Let's put those worries aside. Setting up your new AED is straightforward, and this guide will walk you through five simple steps to turn that box into a fully prepared, life saving station. We will transform any uncertainty into confidence, ensuring your device is ready to go from day one.
Step 1: Unpack and verify what's in the box
First, open the main package and carefully lay out all the contents. While components can vary slightly by model, you should generally find the AED unit itself, at least one set of electrode pads, and a battery pack. Your device will also come with a user manual and often a carrying case.
Check each component against the packing list included in the manual. Pay close attention to the electrode pads and battery. Some models, like many from, come in a "Ready Pack" configuration where the battery and pads are already pre installed in the device. This is a great feature that simplifies your setup right out of the box. If your components are separate, don't worry the next step is just as simple.
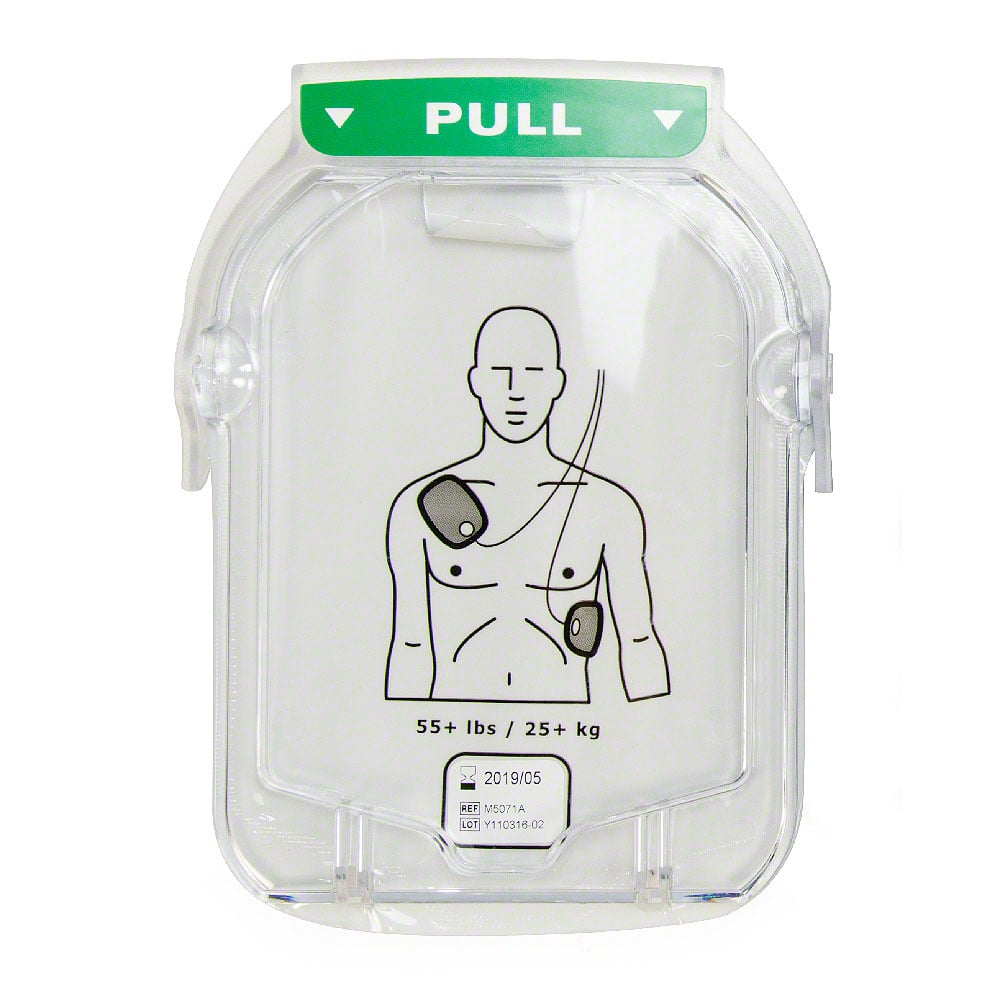
Take a moment to check the expiration date printed on the electrode pads package. These pads have a limited shelf life because the gel that helps them stick to the body and conduct electricity dries out over time. This is your first and most important readiness check.
Step 2: Power up and connect the first beat of your AED
If your battery isn't pre installed, now is the time to connect it. Most AED batteries slide or click into a compartment on the back or side of the unit. You should hear a distinct click, and the device will often power on briefly to initiate its first self test.
Next, locate the port for the electrode pads and plug them in. The connector is designed to fit only one way, so you can't put it in incorrectly. Even if you plan to keep the pads sealed in their package until an emergency, having them connected to the AED unit saves critical seconds. This is why many models, from the user-friendly Philips HeartStart OnSite to rugged Defibtech units, are designed to be stored with the pads connected.
Step 3: The all important self test how to know it's ready
Once the battery is installed, your AED will automatically perform a comprehensive self test. It checks its internal circuitry, software, and battery voltage to ensure everything is functioning perfectly. This isn't just a feature; it's the core of the device's reliability.
After the initial self test, the AED will display its status. For most devices, a green flashing light or a visible "Ready" symbol is the universal sign of a healthy, functioning AED. This indicator is your single most important visual cue. When you see that green light, you can be confident the device has checked itself and is prepared for an emergency. Understanding this simple signal is key, as studies in medical journals like Resuscitation show that clarity and ease of use are critical for layperson rescuers acting under stress.
Step 4: Choose the right spot for your device
Where you store your AED is just as important as setting it up. The ideal location is visible, accessible, and known to everyone in your home, school, or business. Avoid locking it in a cabinet or placing it in an area with extreme temperatures.
Think about central, high traffic areas. For a home, this might be the kitchen or living room. In a small business, a reception area or break room is often a good choice. The goal is for anyone to be able to grab it within 60 to 90 seconds. A wall mounted cabinet can make the device highly visible and protect it from accidental damage.
Step 5: From setup to standby your ongoing readiness plan
Your AED is now set up and ready. But preparedness doesn't end here. Research published in the Journal of the American College of Cardiology found that lack of proper maintenance is a primary cause of AED failure. Your device will continue to perform daily, weekly, and monthly self tests, but a quick visual check is essential.
This is where modern technology makes things simple. Many new AEDs feature Wi-Fi connectivity that can report their status automatically. For total peace of mind, you can use the app to track your device's readiness right from your phone. As users on the App Store note, the app makes managing checks "so convenient and easy," especially if you have devices in several buildings. You can log your monthly visual checks, get reminders for expiring pads and batteries, and ensure your AED is always in compliance and ready to save a life.
Confidence in your hands
By following these five steps, you have successfully set up your new AED. That flashing green light is more than just an indicator; it's a symbol of your readiness and peace of mind. You’ve taken a powerful step to protect those around you, and now you can be confident that your device is prepared to help when it matters most.
Frequently asked questions
Q: What if my AED arrives with the battery and pads already installed?
A: That's great! It means you have a model with a "Ready Pack" or similar feature designed for quick setup. You can skip directly to Step 3 and confirm the device is performing its self test and showing a green "Ready" light.
Q: How often should I check my AED after this initial setup?
A: We recommend a quick visual check at least once a month. Just look for the green readiness indicator to ensure it's flashing and check that there are no visible signs of damage. The Response Ready app can send you monthly reminders to make this process foolproof.
Q: Where is the best place to store my AED at home or in my small business?
A: Store it in a central, visible, and unlocked location. In a home, the kitchen or living room is ideal. For a business, place it in a reception area, hallway, or breakroom. Everyone should know where it is and be able to access it quickly.
Q: Do I need special training to use my new AED?
A: Modern AEDs are designed for use by anyone, with clear voice prompts and diagrams that guide you through every step. While formal training is not required to operate the device, completing a CPR and AED course can build tremendous confidence. Response Ready offers accessible [] to help you feel fully prepared.
Q: What does the flashing light on my AED mean?
A: A flashing green light almost universally means the AED has passed its self tests and is ready for use. If you see a red light, a flashing 'X', or hear a chirping sound, it indicates an issue that needs attention. Consult your user manual or contact our support team for guidance.


