Why Every Parent and Caregiver Should Learn Infant CPR
Cardiac emergencies in infants are rare, but when they happen, the outcome depends almost entirely on what you do in the first few minutes. Unlike adults, infants rarely experience cardiac arrest from heart disease. Instead, the most common causes are choking, drowning, suffocation, and respiratory infections that cut off oxygen long enough for the heart to stop.
Ready to get trained? Response Ready offers pediatric CPR and first aid certification courses designed for parents, daycare providers, and caregivers. Call us at 858-665-2025 to find a class near you.
That distinction matters. It means infant CPR focuses heavily on restoring breathing, not just chest compressions. And it means the technique is different from adult and child CPR in several critical ways.
According to the American Heart Association, about 20,000 infants experience cardiac arrest outside of a hospital each year in the United States. Bystander CPR can double or even triple survival rates. The problem is that most parents and caregivers have never been trained.
What Counts as an Infant for CPR Purposes?
In CPR guidelines, an infant is any child under 12 months old. Once a child turns one year old, you switch to child CPR techniques, which use different hand positioning and compression depth. This age cutoff is based on the infant’s size, chest structure, and airway anatomy, all of which require a gentler, more precise approach.
How Do You Perform CPR on an Infant?
Follow these steps if an infant is unresponsive and not breathing normally. This guide follows the latest American Heart Association (AHA) 2020 guidelines.
Here is a quick summary of the 7 infant CPR steps before the detailed walkthrough:
- Check for responsiveness by tapping the bottom of the foot
- Call 911 (or do 2 minutes of CPR first if alone)
- Open the airway with a gentle head-tilt, chin-lift
- Check for breathing for no more than 10 seconds
- Give 30 chest compressions using two fingers
- Give 2 gentle rescue breaths covering mouth and nose
- Repeat the 30:2 cycle until help arrives
Step 1: Check for Responsiveness
Tap the bottom of the infant’s foot and shout their name. Never shake a baby. Look for any response: movement, crying, or eye opening. If the infant does not respond, move immediately to the next step.
Step 2: Call 911 (or Direct Someone Else To)
If you are alone with the infant, perform 2 minutes of CPR first, then call 911. If another person is present, have them call 911 immediately while you begin CPR. Tell the 911 dispatcher the infant is not breathing and not responsive.
Step 3: Open the Airway
Place the infant on a firm, flat surface (a table or the floor). Gently tilt the head back by lifting the chin with one hand and pressing the forehead down slightly with the other. This is called the head-tilt, chin-lift maneuver. For infants, use a neutral or slight “sniffing” position. Do not tilt the head back too far, as this can actually block the airway.
Step 4: Check for Breathing
Look at the chest for rising and falling. Listen for breath sounds near the nose and mouth. Feel for air on your cheek. Spend no more than 10 seconds checking. If the infant is not breathing or only gasping, begin CPR immediately.
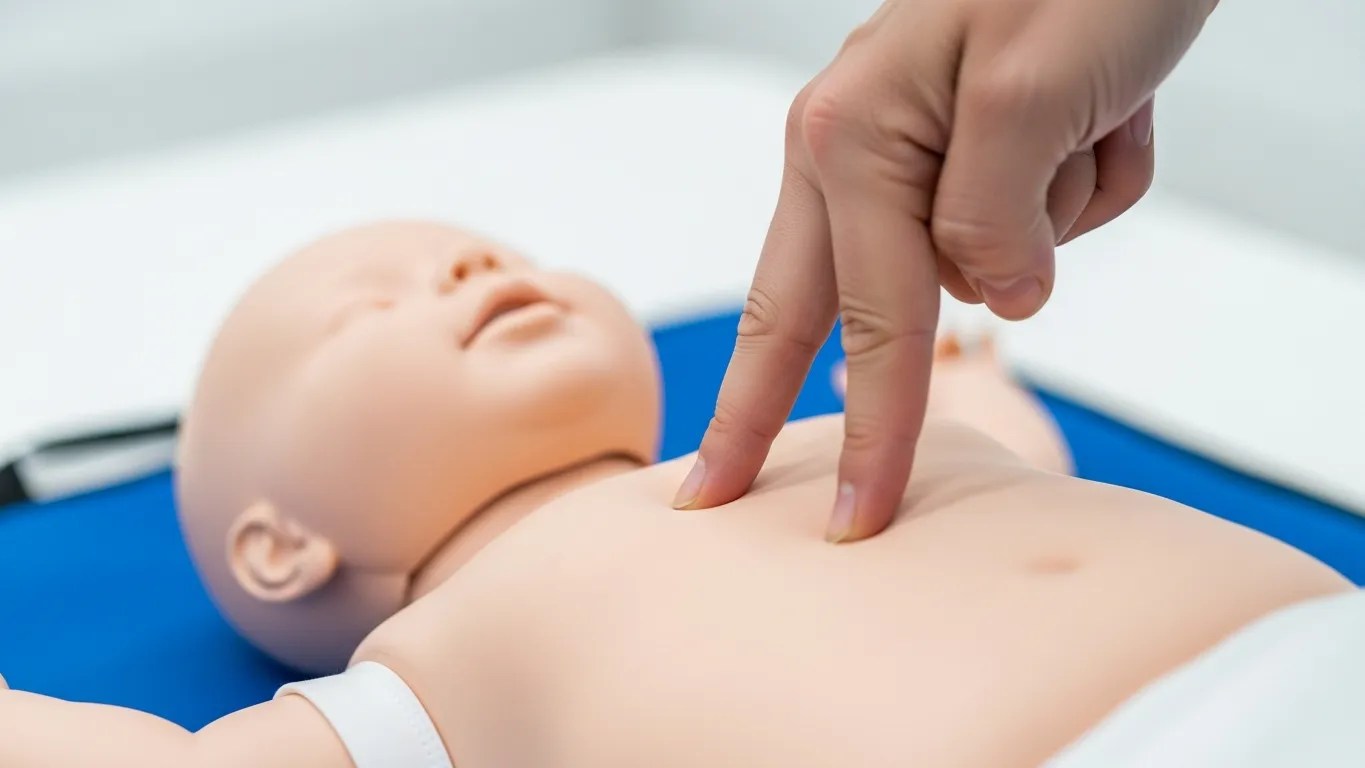
Step 5: Give 30 Chest Compressions
Place two fingers (your index and middle finger) on the center of the infant’s chest, just below the nipple line on the breastbone (sternum). Push straight down about 1.5 inches (approximately one-third the depth of the chest). Compress at a rate of 100 to 120 compressions per minute. Allow the chest to fully recoil between each compression. Count aloud: “1 and 2 and 3 and…” up to 30.
Step 6: Give 2 Rescue Breaths
Cover the infant’s mouth and nose with your mouth to create a seal. Give 2 gentle puffs of air, each lasting about 1 second. Watch for the chest to rise with each breath. If the chest does not rise, re-tilt the head and try again. Use only enough air to make the chest visibly rise. Blowing too hard can damage an infant’s lungs.
Step 7: Repeat the Cycle
Continue alternating 30 compressions and 2 breaths. Do not stop until the infant starts breathing on their own, emergency medical services (EMS) arrives and takes over, an AED becomes available, or you are physically unable to continue.
How Is Infant CPR Different from Adult and Child CPR?
| Factor | Infant (Under 1 Year) | Child (1-8 Years) | Adult (8+ Years) |
|---|---|---|---|
| Compression technique | Two fingers | One or two hands | Two hands, interlocked |
| Compression depth | 1.5 inches (4 cm) | 2 inches (5 cm) | 2-2.4 inches (5-6 cm) |
| Compression rate | 100-120/min | 100-120/min | 100-120/min |
| Rescue breaths | Cover mouth AND nose | Pinch nose, cover mouth | Pinch nose, cover mouth |
| Ratio (single rescuer) | 30:2 | 30:2 | 30:2 |
| Head tilt | Neutral/slight sniffing | Moderate tilt | Full tilt |
| AED pads | Pediatric pads (front/back) | Pediatric or adult pads | Adult pads |
The biggest difference is hand placement. Adult CPR uses the heel of both hands on the center of the chest. Child CPR uses one or two hands depending on the child’s size. Infant CPR uses just two fingers because the infant’s ribcage is fragile and the heart is small. Applying too much force can cause serious injury.
Want a deeper dive into CPR techniques for all ages? Read our complete guide: CPR and AED Training Programs at Response Ready.
Infant Choking: When CPR Becomes Necessary
Choking is the leading cause of cardiac arrest in infants. Babies explore the world by putting objects in their mouths, and their small airways can be blocked by surprisingly common items.
Common Choking Hazards for Infants
- Small food pieces (grapes, hot dogs, popcorn, nuts, hard candy)
- Small toys, toy parts, or button batteries
- Coins and small household objects
- Balloons (deflated or popped pieces)
- Formula or breast milk (if feeding position causes aspiration)
How to Help a Choking Infant
If the infant is coughing forcefully, let them cough. This is the body’s natural way of clearing the airway. Do not intervene unless the infant cannot cough, cry, or breathe.
If the infant cannot breathe:
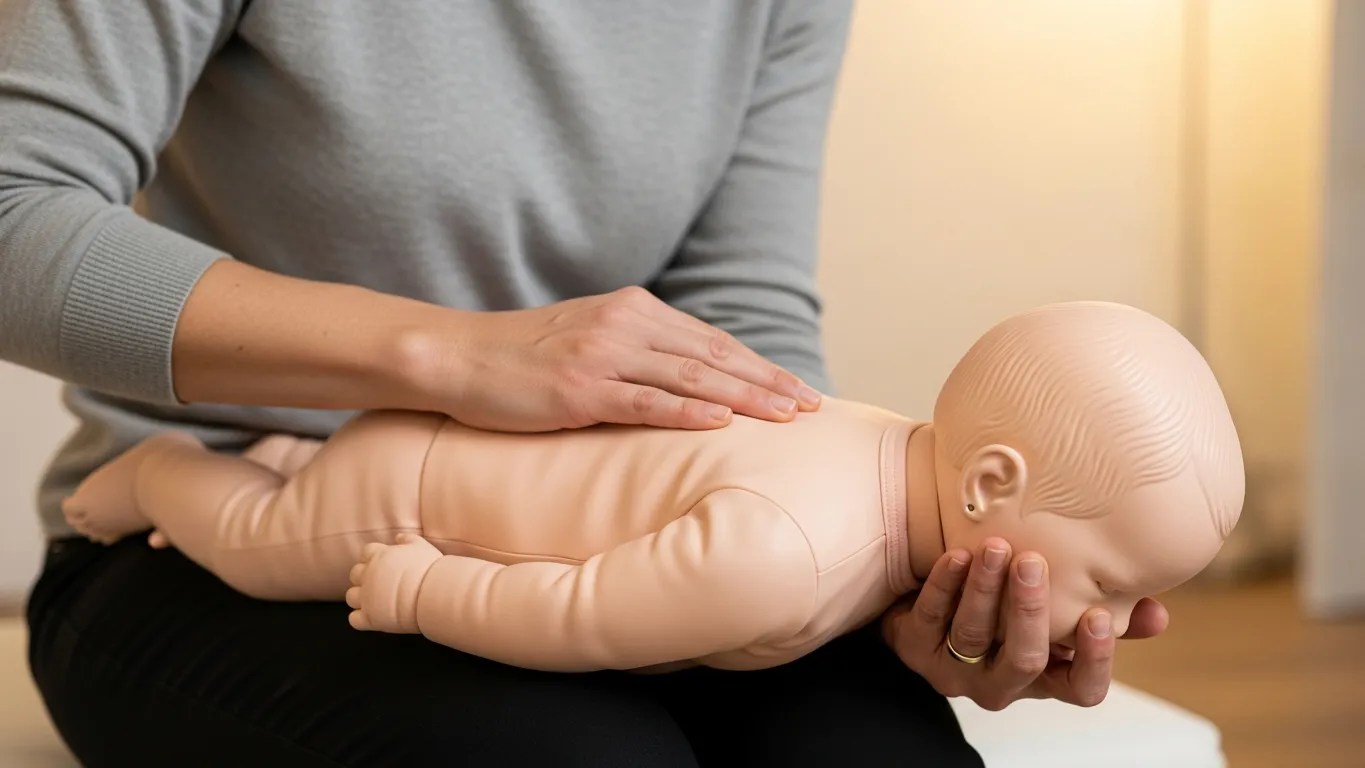
- Give 5 back blows. Hold the infant face-down along your forearm, supporting the head and jaw with your hand. Rest your forearm on your thigh. Deliver 5 firm back blows between the shoulder blades using the heel of your other hand.
- Give 5 chest thrusts. Turn the infant face-up on your forearm. Place two fingers on the center of the chest, just below the nipple line. Give 5 quick chest thrusts (similar to CPR compressions but sharper).
- Repeat alternating 5 back blows and 5 chest thrusts until the object is dislodged or the infant becomes unresponsive.
- If the infant becomes unresponsive, begin infant CPR immediately (30 compressions, 2 breaths). Before giving rescue breaths, look in the mouth for the object. If you see it, remove it. Never do a blind finger sweep on an infant.
For more information on choking rescue devices and techniques, visit our detailed guide.
When Should You Call 911 or Use an AED on an Infant?
Call 911 Immediately If:
- The infant is unresponsive and not breathing normally
- The infant’s skin turns blue, gray, or very pale
- The infant was submerged in water
- You suspect poisoning or a severe allergic reaction
- The infant had a seizure and is now unresponsive
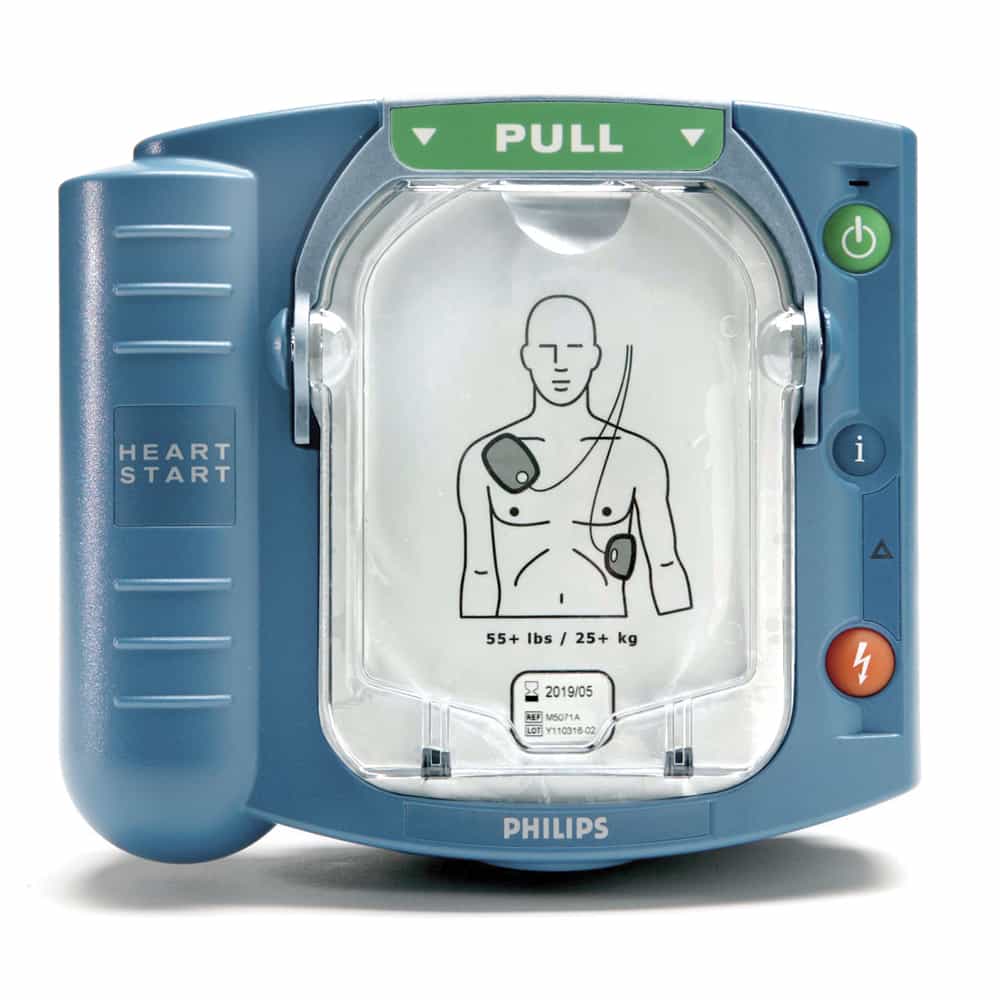
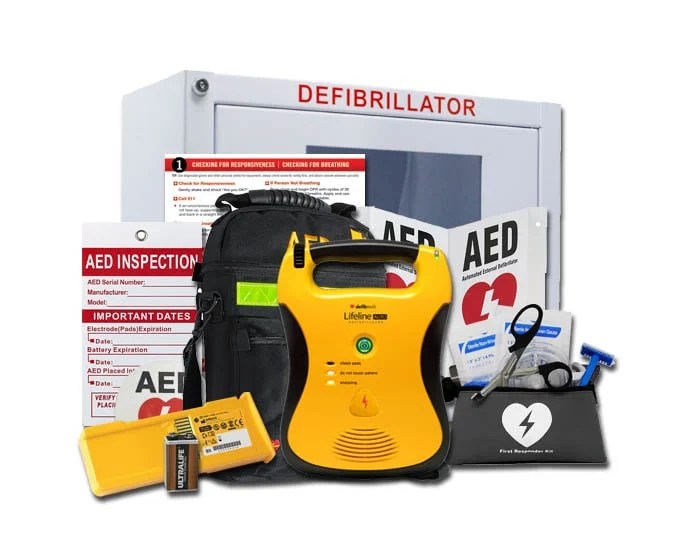
Using an AED on an Infant
Yes, you can and should use an automated external defibrillator (AED) on an infant if one is available. The AED will analyze the heart rhythm and only deliver a shock if the rhythm is shockable.
For infants, use pediatric AED pads whenever available. Pediatric pads deliver a lower energy dose appropriate for small bodies. If pediatric pads are not available, use adult pads. Place one pad on the infant’s chest and one on the back (anteroposterior placement) to avoid overlap.
Response Ready carries pediatric AED pads from all major manufacturers including Stryker/Physio-Control, Defibtech, HeartSine, and Cardiac Science. Having pediatric pads on hand is essential for any facility that serves children.
What Are the Most Common Infant CPR Mistakes?
- Compressing too deep. Infant ribs are flexible, but 1.5 inches is the correct depth. Going deeper risks fractures and internal injury.
- Tilting the head too far back. Overextending the neck can kink the infant’s airway. Keep the head in a neutral or slight sniffing position.
- Blowing too hard during rescue breaths. Use gentle puffs, just enough to see the chest rise. Excessive force can damage lung tissue.
- Stopping CPR too early. Continue until EMS arrives or the infant shows clear signs of life (breathing, movement, crying).
- Using one hand for compressions. Two fingers only. Using a palm or full hand delivers too much force.
- Shaking the infant to check responsiveness. Never shake a baby. Tap the foot instead.
Frequently Asked Questions About Infant CPR
How many compressions per minute for infant CPR?
The AHA recommends 100 to 120 chest compressions per minute for infant CPR, the same rate as adult and child CPR. A helpful rhythm reference is the beat of the song “Stayin’ Alive” by the Bee Gees.
Can you do hands-only CPR on an infant?
No. The AHA does not recommend hands-only CPR for infants. Because infant cardiac arrest is usually caused by breathing problems rather than heart problems, rescue breaths are critical. Always perform full CPR with both compressions and breaths on infants.
What is the compression-to-breath ratio for infant CPR?
For a single rescuer, use a 30:2 ratio (30 compressions followed by 2 rescue breaths). For two-rescuer infant CPR performed by healthcare providers, the ratio changes to 15:2.
Should I use an AED on a baby?
Yes. If an AED is available, use it as soon as possible. Use pediatric AED pads if available. If not, adult pads can be used with anteroposterior placement (one on the chest, one on the back).
How deep should infant CPR compressions be?
Compress the chest approximately 1.5 inches (about 4 centimeters), which is roughly one-third the depth of the infant’s chest.
At what age do you stop using infant CPR techniques?
Infant CPR techniques apply to children under 12 months old. After the first birthday, switch to child CPR techniques, which use one or two hands instead of two fingers.
Take the next step to protect the children in your life. Response Ready provides CPR and AED training through our CPR1 program, with certified instructors nationwide. Browse AED packages or call 858-665-2025 to speak with our team.